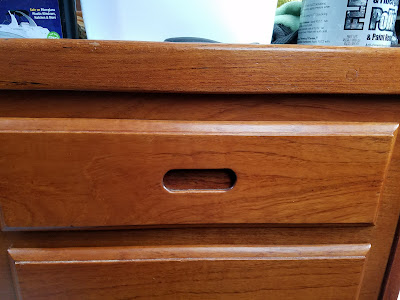
The weather here in Washington State has turned Cold and wet... not the optimal conditions for sailing, So I decided I would do some many needed projects on the Boat. The first one I wanted to do was to redo the countertops and refinish the fiddle rails and cabinet. If you don't know what a fiddle-Rail is, It is that wood on the edge of the counter top that keeps things from sliding off in the when the boat rocks. I hate, hate, HATE that faux wood Formica counter top that came with this boat 36 years ago... I guess it was in fashion then, but it looks awful now. I scored some basic White Formica at Lowe's at half price because it had a hole in it, but I could work around that... I have seen other Catalinas with white counter tops and it really brightens up the cabin, and makes the Teak rails and cabinet stand out.

So I got by Bro to come down and give me a hand to yank this all out. Plus he owns a truck and he would help me get this all home... It was going to be a simple job, and it shouldn't take too long, Right? Riiiiiiight!
 |
| My Brother in law asking "are you SURE you want to take that out? |
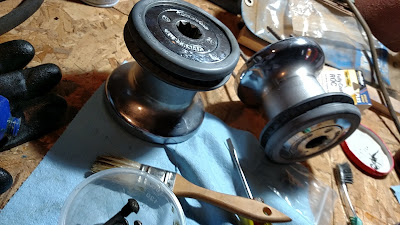
The first thing to do was to pull out the Stove/Oven. That wasn't too hard. The hardest part was trying to get the split-rings off without having them fly off and ricochet their way around the cabin. I also had to disconnect the gas (after making sure it was shut off at the canister... no want no boom boom!), and disconnect the Piezio-electric starter wires... easy peezy! Then we had to get it off the hangars without dropping it... it is a bit on the heavy side, and very cramped quarters, but we got it out. we pulled out he drawers and emptied them, and removed everything from the counters and we were ready to start.
 |
| The Stove/Oven has been removed, drawers out and cabinet door removed |
I pulled out the shallow sink, as it was affixed with 4 screws, and clear SILICONE! Not a good choice for sinks, as getting them off is a nightmare... I am guessing the PO did that as the siliconing job wasn't very neat either... pretty sloppy. However my Painters multi-tool (the scraper part) did a fairly good job of cutting through the silicone, but it took a long time and a lot of elbow grease, and finally I was able to muscle out the sink, although some of the Formica came off with it... Good thing I was going to replace it!
 |
| Cutting through the Clear Silicone that was used under the second sink.... a LOT of elbow grease involved here... |
 |
| Finally muscled it out! along with part of the counter top..... |
The next thing to do was to figure out everything that had to be disconnected... only one way to do that.... just dive right in... literally!
 |
| Now where does that water supply line come from? and how many more screws are holding this thing in? |
After a lot of reconnaissance and trial and error, we finally were able to remove the cabinet. When we did. we found that the end of the counter that stick out from the cabinet and over the fiberglass was wet... no, correction, it was SOAKED... so much so that it DRIPPED continually... so out to the cockpit it went in short order.... hmmmm... some spilled water must have found its way to the port edge of the counter, and since it is not caulked, (rather there is this strange leather thing attached to the counter edge), It must have gone under the counter... after all, when I checked the level of the counter earlier, I found that the port side was low, so water would run that way. I was wrong! not about the Level, but the source of the water. After getting the rest of the counter out, I found that water was coming in under the bulkhead (below and port of the electrical panel no less) Where was THAT coming from? After clearing out the port Lazerette in the cockpit, and using a flashlight, I found that the port side stanchion nearest the bulkhead was leaking,
Great! That gets added to the projects list, and I will have to do it before I reinstall the counters...
 |
| you can see mold all along the fiberglass, and the Dark Spot on the left along the aft bulkhead is where the water was coming in..... |
 |
| Where the Cabinet sat wasn't TOO bad. not bad for 36 years.... I don't know how often it was removed though. here you see the water supply on the left, then the two sink drains (no wonder the sink drained so slow... I will improve this) and that hose on the right, just sitting there not connected to anything? Well I though it might be a vent line.... WRONG! this is the Drain hose for the sink in the head! Good thing I have never used that sink up to this point! Sigh, ANOTHER project goes on the list... Well I was gonna redo the counter in there too anyway! |
Another thing I found along the was was this hose... it is attached to the Engine's cooling system, and traveled up the starboard side of the cabinet between the Drawer rails and the side of the cabinet. so it makes a big loop like an upside down U... at the top is a u-shaped device... I think that is an Anti-Siphon valve. (An Anti-siphon valve allows water to flow one way, but not the other) there was no anti chafing put where the hose touched the cabinet side, and over the years, the engine vibration rubbed a nice little V shaped groove in it. Good thing I decided to remove the cabinet! when this hose failed it would be pretty wet and messy! Another Project goes on the list... do you see a pattern here?
v
 |
| This is a panoramic BEFORE cleaning pic... |
 |
| This is a panoramic shot After cleaning! Now to stop the leak.... later... that's my ADD kicking in... |
 |
| the entire area after cleaning.... |
 |
| One good thing I have nice access to the engine... will have to take advantage of that and do some inspection and cleaning and maybe get a marine diesel mechanic to evaluate it for me... anyone know a good mechanic? |
 |
| You see that black thing in the middle of the picture? I have been looking for that since I bought the boat! it is the Knot Meter sensor... the Knot meter hasn't worked since I bought the boat. the sensor is designed so you can remove it while swiftly putting a plug in the resulting hole so you can clean the junk off the paddle wheel... No way I can do that while it is sitting under the cranking battery... oh well, a project for the Haul Out.... |
 |
| Looks kind of odd without the galley.... |
When I got the counters home and got a GOOD look at them, I realized the scope of the project was going to increase AGAIN! I would have to replace the ENTIRE counter top, Plywood and Formica... These were just too far gone to save....
 |
| This is the underside of the Aft/Port counter.... you can tell where it sat on top of the fiberglass....you can also see that the water flowed from the aft where the water came under the bulkhead (on the left), to port (bottom of Pic) |
 |
| This is what is left of the main Galley counter top.... |
 |
| As you can see, it is literally falling apart... |
Well, There is MUCH more to come on this subject.... Stay tuned and I will have more up very soon!
JEM


Comments
Post a Comment