So, now that I took it all apart and "purtied it up a bit " it was time to try to put it all back together. The first thing to do was to re-install the Fiddle rails. To start this process, I first used a 3/8 inch Forstner bit (a drill bit that drills flat-bottomed holes) to clean up the holes for the screws and plugs and get the last remnants of the old plug out.
 |
| This is a Forstner bit... 3/8 inch in size |
 |
| Cleaning up the hole with a 3/8 inch Forstner Bit |
 |
| Drilling a Pilot hole for the screw |
 |
| time to put in the screw! |
Then I need a new plug to cover up the screw head. This is just a short dowel, 3/8 inch in diameter, made out of Teak (of course!). you can buy them on-line, but since I had the means, I decided to make them myself. I bought a short length of teak at McClendon's (a local hardware store... love that place!) as well as a plug cutter. Both things together were less than 8 dollars, and I will be able to make a MESS of plugs! (as they say in the south). I just put the plug cutter in my Shopsmith Mark V, in drill press mode, and VOILA! Teak plugs!
 |
| This piece of Teak cost me about 4 bucks. The Plug Cutter, Mounted in the drill press, a couple of bucks. Together, they made perfect plugs! |
|
|
|
|
|
|
|
 |
| Put a piece of scrap under your plug stock so you can drill all the way through. |
 |
| Cuts smooth as Butter! |
 |
| I used a small common screwdriver to get the plug out |
 |
| And there you have it, one plug! |
 |
| I think I will get a bunch of plugs out of this small piece of teak... especially since one plug can fill 2 to 3 holes.. Oh, Look, here is some actual saw dust I can use for future wood putty! (see my previous post... ) |
It is now just a matter of tapping in the plug into the hole solidly, with a rawhide mallet (you can use a regular hammer, just don't hit too hard or you will break the plug or mushroom the head), then cutting away the excess. I used my Dremel Multi-Tool for this, and it did the job well! After that, Sand it close to flush with my Moto-Tool, then flush with the surface by hand. This, of course marred up the finish, so now it was time to put a couple more coats of varnish on the fiddle rails now the plugs are in place and sanded smooth.
 |
| After tapping in the plug with a rawhide mallet, it is time to cut it close to flush |
 |
| Almost through. My Dremel Multi tool makes short work of this. |
 |
| I will sand the majority of this with my Dremel Moto tool sanding drum |
 |
| Once it is close, I will sand the rest flush by hand. |
 |
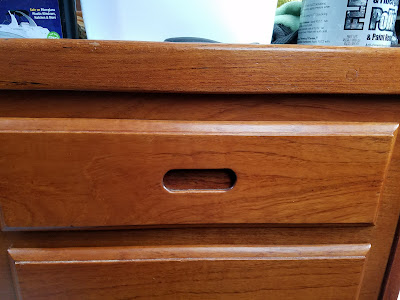
| Before |
 |
| After |
So, looking at the Counter Before and after pictures on the right, which Would you rather have in your galley? Wink, Wink!
Personally I thing the white Formica really makes the rails pop, and will brighten up the interior of the cabin quite a bit.
Now for the other counter. After getting the fiddle rails attached, it is on to fixing a small boo-boo and putting in the sinks.
When I was removing the sinks after a dry-fit, I used a bit too much force and chipped of a piece of the Formica. so I used painters tape to mask the area around the chip, and then sprayed the counter and backside of the chip itself with contact cement. After it was tacky, I CAREFULLY replaced the chip, and used the J-roller to get out the bubbles and firm up the bond.
 |
| I masked the counter around the chip |
 |
| Sprayed both surfaces with contact cement |
 |
| After the chip was replaced, I removed the tape |
 |
| Cleaned up any residual glue with Acetone |
 |
| and Presto! where is the chip? |
Now is the time to put the sinks in. As they sit on top of the counter surface, we will have to use something in between to act as a gasket, to keep water and debris from getting under the the lip of the sink. the thing NOT to use is Silicone. it is messy, and although it will seal the area well, if you ever need to remove the sink for any reason, it is virtually impossible to remove the sink without damaging counter, and causing lots of choice colorful sailor language to come out of your mouth as you struggle to remove the sink my cutting through the silicone.

What you WANT to use is good, old fashioned Plumbers Putty. This stuff has been around for ages. It adheres fairly well, and forms a good water-tight seal. The real beauty of this stuff is that it never totally dries, so if you need to remove the sink later, it is really easy to do, and it cleans up easily. It is also Cheap and easy to use... two of my most favorite attributes! I have use this stuff in many a sink, drain, faucet, and so on in many of my houses in the past. The application here is identical.

First you want to get a gob of it (that is a technical term) in your hand.
Then, just like we all did when we were kids playing with Play-Dough or similar medium, make a long snake by rolling it back and forth on the counter....

Don't be stingy with the putty, better too much than not enough. you will totally be able to re-use any excess, I promise!
Now it is time to go all around the sink opening with the Putty.
I don't want the putty to move when I put the sink in, so I need to
stick it to the counter. to do this, I use the "Rolling Thumb
Technique". Once the putty is in place the side of my thumb on it with a
bit of pressure.

Then I roll my hand forward along with the thumb to
flatten the putty out a bit, and in the process, getting it to stick to
the counter.

Easy as 1,2,3!
Having rolled out the putty all around the opening, it is now time to install the sink. Just put the sink into the opening, and secure with what ever the sink uses. for this first sink, it used four screws from the top of the slink lip. for the Main sink, which is deeper, the clamps are underneath. As you tighten, the putty will start oozing out under the sink lip. After the sink is secure, it is a simple matter to take a flat head screwdriver or small putty knife and scoop up the excess putty. Put it back in the container and it is, as promised, ready to be re-used.
 |
| put in the sink |
 |
| Secure the sink. This one uses 1 screw on each edge |
 |
| Scrape up the excess with a screwdriver or putty knife |
 |
| The most common way to secure sinks is with the Tab/clamp. The tab is welded to the sides of the sink |
 |
| This is the clamp we will use to secure the main sink |
 |
| The "L" shaped bracket goes in the tab |
 |
| And then we tighten the clamp with a socket wrench |
 |
| After all the clamps are in, scrape up the excess putty |
You may find that the putty leave some residue where it squeezed out, and where you were rolling it. No problem. Use a little bit of Acetone ( or nail polish remover... that is what the smell reminds me of... HEY I grew up with 4 sisters.... you learn what that stuff smells like!) on a cloth and wipe... cleans it up well!
I forgot to take pictures of it, but I used this same process to put the drains in the sinks... works great!
My Bro came over with his truck to help me take all this stuff back down to the boat. We got it all dry fitted, and, by George, it looks pretty darn good! Even if I do say so myself!
 |
| My Bro, ready to help be take all this stuff BACK. |
 |
| Phew... it fits! now to add the other side... |
 |
| Perfecto Mundo! |
 |
| It is already looking better |
 |
| Ain't That a Purty sight? |
At the present time this is just dry fitted. I can't put it in permanently until I make sure I have fixed the leak that destroyed the counters in the first place... What a coincidence! Sounds like a topic for my next exciting NautaByte installment!
Y'all come back now, ya' hear?
As always, please feel free to leave a comment below! it is always good to hear other points of view!


test comment
ReplyDelete