When it rains.... it LEAKS!

My forward port side port (the Nautical word for window) leaked like a sieve when it rained. And this is Washington State.... it rains a LOT here, so this was a BAD thing. Here is what I collected after a couple of days of rain...

And that was just the water that leaked into the cabin.... heaven only knows how much was leaking within the bulkhead (that's Nautical for wall)....
So Saturday was one of the nicest days we have had on record here this year, and instead of going out for a sail, I figured it was the best time to tackle the leaky port issue. I was really worried (as usual) about doing this, wondering if I was going to bite off more than I can chew, and (as usual) it turned out to not be as big a deal as I was making it out to be.
After removing the screws holding on the interior trim ring and removing it, I had to cut through the (Gallons) of 4200 and clear Silicone sealant that was holding it in. Fortunately, I had a paint scraper attachment for my Dremel Multi-tool that made short work of most of this...

I still had to run a Stanley knife around the corners though.
Then I went outside to run a safety razor under the lip of the port. That SOUNDS easy, but I found I had to coax the razor blade along with a small screwdriver, taking care not to scratch the gel coat... After a lot of going back and forth, redoing a couple of areas both inside and outside, I was finally able to get the port out of the bulkhead.


Next thing to do was to remove all of the 4200/Silicone residue that is left. I started by using a sharp, wide chisel to scrape the majority of it off, taking care not to dig into the gel coat.

I followed this up with the Safety Razor. Between the two, they did a pretty good job of getting most of the residue off. After that, it was on to some 2000 grit sandpaper, followed up by a wipe with some Acetone. It is important that you get all of that silicone removed, because not much will stick to it when you replace the port.

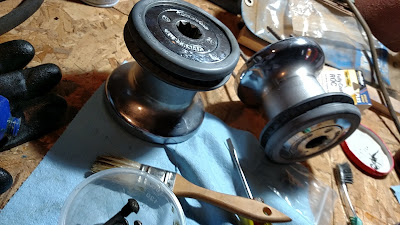
As it turned out, that was the EASY part, but it still took a couple of hours. Now for the HARD part. removing all of the silicone crap from the port itself. There were a lot of nooks and crannies to dig into to get all of that out. I concentrated on the lip to get it completely off, and took as much out of the channel as I could. it was a LOT of work, and it was really unnecessary in my book, it the PO would have just removed the port and re-bedded it properly when it started leaking. it is the outer lip that does the business end of sealing against the bulkhead to keep the water out. the channel part really doesn't do anything to keep water out, but I think the PO just squeezed it in from the inside thinking that if he filled that void up, it would keep the water at bay.... and it might have for awhile, but eventually it started leaking again because water was still getting past the lip....
 |
| Yeah..... this is gonna take awhile |
 |
| Dig, scrape, sand with 2000 grit, acetone, Repeat.... |
 |
| Clamping the forward side of the port |
 |
| Aft side of the port... not yet epoxied and clamped.... |
 I added 2 layers of Butyl tape all around the lip of the Port (better too much than not enough) and added an extra layer on the forward side, as I noticed the port never fit flush against the bulkhead there, so that is where the major part of the leak came from.
 |
| You can see here that I have put Butyl Tape on the lip, but you can only see the bottom portion of the lip, due to the angle of the shot..... |
When I went outside, I saw what I was looking for.... squeeze out of Butyl Tape all around the port, especially on the forward edge. this indicates a good seal is going on
 |
| Squeeze out of the Butyl Tape all around the port.... |
 |
| This is a closeup of the forward corner where the lions share of the leak came from.... nice squeeze out |
in a few days, I will tighten the screws a bit more, then take a sharp Stanley knife all around the port to remove all of the squeeze out.
Shortly after this, I gave it an "Acid Test" .... I used a pressure washer all around the port to clean all the winter filth off of the cabin, then went inside..... not single drop.... SCORE!
I am on my way to a drier boat!
Till next time!
lll

We do love us some butyl tape and have quite a supply on Galapagos. We're going to do a couple of test spots on our hatches before committing to a sealant to rebed these lenses. Doesn't a dry boat feel good?
ReplyDelete