Travelling in Style!!!
No, My friends, this post is not about one who travels.... on the contrary, it is about that necessary piece of hardware that I rarely used, because it was such a pain in the @$$ to use. Of course, if you own or have owned an older Catalina 30 like mine, you know I am talking about the Main Sail traveler..
 |
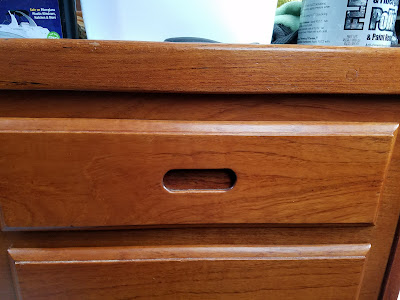
| Even though this is screaming for a traveler adjustment I didn't because it was such a PAIN! |
So I ordered an upgrade kit that Garhauer Marine Hardware had for my Catalina 30 (on sale too, I might add!)

This would allow me to get rid of this old out-of-date traveler in favor of a traveler of a different design that would work much more easily and efficiently!
As I said earlier, Garhauer puts out really great, and heavy duty stuff, but they include NO DIRECTIONS on how to install this. I did find a You Tube video that showed how to install it, and that was the basis for my installation here. The first thing to do was to remove the old Traveler... this took me all of about 10 minutes. First remove the Main sheet bail and tie off the boom out of the way. Then, remove 6 cap nuts and 6 regular nuts, tap out the bolts and VOILA!
 |
| Old traveller GONE! Looks better already! I tied off the boom to a winch on the port side. |
After scrubbing the deck where the old teak blocks were, I could mark where the new mounts would go. To figure this out, I just basically put the mounts on the traveler bar and lightly snugged each of the 10 supplied bolts (5 per side) down, then I put the traveler on the deck. I focused on aligning the center holes in the mounting bracket with the old traveler holes, as that represented the center of both traveler bars, and making sure it was centered side to side (I measured from the outboard edge of the bracket foot to the inboard edge of the hand rail. One thing you should keep in mind is if you have a dodger to clear. It is possible that you may need to scoot the traveler forward or aft a bit to accommodate it.


Drill, baby, drill!


 |
| One down, 11 more to go! |
 |
| 6 down, 6 to go! |
Just put the bit in the hole, and drill for a bit... it is self centering. I find that it does a little better job if move the drill in a circular motion counter clockwise and use a slower speed.

Now it is time to use some of my favorite stuff to bed the hardware. It is my favorite because it is easy to use, isn't messy, never hardens, makes a great seal, and it is fairly easy to remove if necessary. BUTYL TAPE! It comes on a roll
as pictured on the left, and I use it for MANY things.

This will fit nicely in the holes that I countersunk earlier

I didn't mention this earlier, but these bolts are NOT supplied by Garhauer.


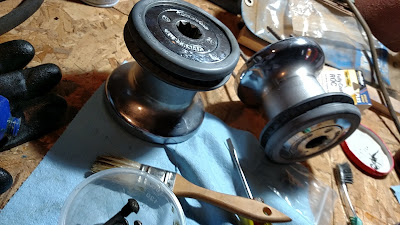
Now comes the time to mount the pulley banks on either end of the traveler. First thing to do is to back out these allen bolts with, what else... an Allen wrench! These is also known as a "Hex head bolt" because of the eight sided hole.


Once you get them out, then mount the bank of pulleys by lining up the holes and reinstalling the hex head bolts. There IS a right and a left bank... the large opening should be inward, and the posts to the outside, as shown on the right.

A caveat about this line. It is NOT PROVIDED by Garhauer, nor was there any guidance on what type should be used or how much was needed. One thing I will say about Garhauer is they have excellent customer support. when I called and talked to Guido (No lie... that's his name!) the tech support guy, he recommended 5/16 double braided line, and he gave me a formula for the length... it is this: take the length of the traveler bar, multiply that by 5, (because this is a 5 to 1 system)and then add whatever length it will take to run the line to the cockpit. That is how much you will need for one side. For the total amount, multiply that by two. In my case the bar was 6 feet long, and I needed 3 feet to lead to the cockpit, so it went like this: 6 (bar length) X 5 = 30 + 3 (length to cockpit) = 33 (length for one side) X 2 = 66 feet. I ordered 100 feet, because I wanted some extra line for finally setting up some Jiffy Reefing lines for a later project. Running the lines is easy. I started from the cleat fairing, ran it through the bottom pulley, then through the bottom pulley on the traveler car, then to the middle pulley to the top pulley on the traveler car, then to the top pulley then tying it off on the bail (post). I used a Bowline, which has worked great.

A NOTE ABOUT RUNNING THE LINES.....
Make sure you run the lines on the INSIDE of all 3 posts on both sides.... Take a look below and you can see that I messed up twice on the left pulley bank... where the line runs OUTSIDE the post.... this can foul the lines later (don't ask how I know....)

 Now move the traveler car as far as it will go to the other side. Run the bitter end of the line to the cockpit. this is as much line as you will need, so after figuring out how much you need running to the cockpit, then whip the line in two places about 1/2 inch apart. this is where you will cut the line. I used a lighter to melt the ends so they wouldn't continue to fray. Now you are ready to thread the other side in the same manner.
 Here's a tip I found out from Guido.... once you have the main sheet tight (like in the picture to the right), you need to take a small Allen (Hex) wrench to the Hex head bolt where the block swivels (look for a small hole). Tighten that bolt until it is tight. That will lock the block in at the angle it is at, and will make it fixed position block. Do this for the 3 on the boom and the 3 on the Traveler car. let the one(s) at the mast swivel freely. This will resolve the issue of the main sheet twisting around between the boom and the Traveler car, which I had with my old blocks. This was really annoying when you were trying to loosen the sheet!
So the bottom line to all of this is that I LOVE the new traveler, and now use it all of the time!!! It makes making small adjustments to the sail position a BREEZE! If you are thinking of upgrading, I say think no longer and DO IT! you will wonder why you didn't do it sooner!
 |
| Traveler set amidships |

'til next time!
JEM

That's a right pretty piece of equipment you added! I'll walk down and admire it in person.
ReplyDelete